รวมลิงค์สำหรับ iPhone Developer
Fri, 06/11/2010 - 19:48 — jackติดตั้ง APK บน Android
Fri, 06/11/2010 - 17:11 — jackก่อนอื่นต้องติดตั้งโปรแกรม AppInstaller จาก Market place ก่อน
จากนั้นไปหาไฟล์ .apk มาทำการติดตั้ง อาจจะหาจาก https://slideme.org หรือ http://www.4shared.com
ที่มา thaiandroidclub.com/, zayyes.com/
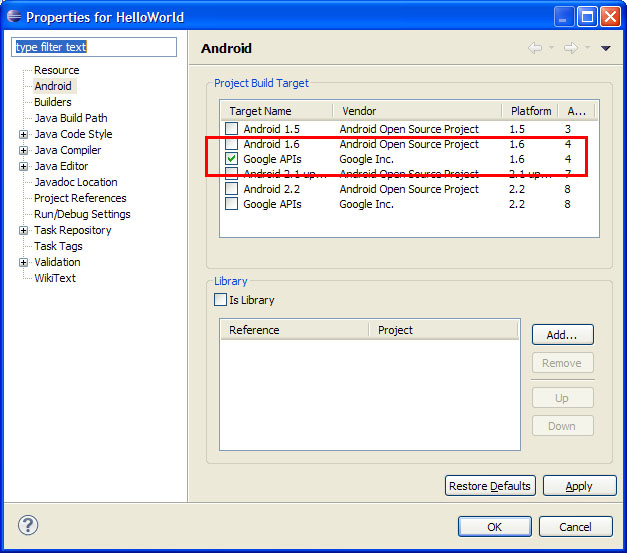
วิธีแก้ไข Error: Your project contains error(s), please fix them before running your application
Wed, 06/02/2010 - 17:15 — jack1) ตรวจสอบว่าได้ทำการติดตั้ง AVD แล้วหรือยัง
2) Set a target for your project (i.e.: Google APIs 1.6) โดยคลิกขวา ที่โปรเจ็กส์ของเรา แล้วเลือก Properties -> Android -> Project Build Target ให้เลือกเป็น Google APIs
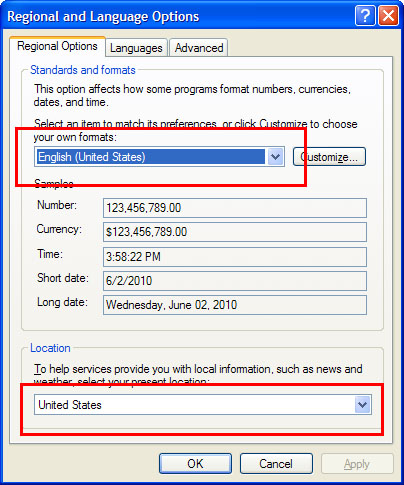
วิธีแก้ไข Error: Debug certificate expired
Wed, 06/02/2010 - 16:59 — jackแก้ไข ให้เป็น English
จากนั้นไปที่ "C:\Documents and Settings\<user>\.android" หรือ "C:\Documents and Settings\<user>\Local Settings\Application Data\Android" แล้วทำการลบไฟล์ debug.keystore
เสร็จแล้วให้ rebuild โปรเจ็กส์ใหม่ โดยไปที่เมนู Project>Clean ... จากนั้นก็รันตามปกติ
ติดตั้ง Android SDK บน Eclipse ด้วย Android Development Tools (ADT) Plugin
Wed, 06/02/2010 - 13:04 — jackก่อนอื่น ทำการดาวน์โหลดและติดตั้ง Eclipse เวอร์ชั่น 3.4 หรือใหม่กว่า
http://www.eclipse.org/downloads/
ดาวน์โหลด SDK (SDK download page)
เซ็ต path ของ Windows ไปที่ tools/ directory
ติดตั้ง ADT Plugin
เปิด Eclipse แล้วเลือกเมนู Help > Install New Software.
Download the Android SDK
Wed, 06/02/2010 - 12:33 — jackAndroid SDK สามารถ Download ได้ที่ http://developer.android.com
อ่าน-เขียนไฟล์ด้วย Python
Fri, 05/14/2010 - 19:00 — jackเชียนไฟล์
f = open('/tmp/workfile', 'w')
อ่านไฟล์
f.read()
อ่านไฟล์เป็นบรรทัด
f.readline()
ตัวอย่างการใช้ pickle
http://docs.python.org/library/pickle.html
ที่มา: daimi.au.dk/~besen/TBiB2007/lecture-notes/persistence.html, docs.python.org/tutorial/inputoutput.html
Run a system command automatically at startup
Fri, 05/14/2010 - 15:26 — jackกำหนดคำสั่งที่จะเรียกใช้ (ในที่นี้คือ /home/user/command) ไว้ใน crontab ดังนี้
sudo crontab -e
@reboot /home/user/command
หรือจะพิมพ์คำสั่งไว้ใน text ไฟล์ แล้วใช้คำสั่ง crontab textfile ก็ได้
ที่มา: help.ubuntu.com/6.10/ubuntu/desktopguide/C/ch10s04.html